No items in cart
Buy 2 Get 1 Free
Add 3 products to the cart and get the cheapest for free at checkout.
Add 3 products to the cart and get the cheapest for free at checkout.

.webp)
A harsh mix is one of the most frustrating issues for producers.
If you’ve ever struggled to get smooth, silky top end, you know how hard it can be avoid harsh sound.
But what is the root cause of harshness in a mix? What can you do to avoid it and how can you deal with a harsh mix if you’re stuck?
In this article, I’ll explain the main causes of unpleasant harshness and how to fix them without starting from scratch.
A harsh mix is a finished track that exhibits sharp, uncomfortable emphasis of the upper midrange frequencies.
Harshness is the feeling of grating discomfort that provokes ear fatigue after extended periods of listening.
A harsh mix can distract listeners from the content of the song and push them to turn down the volume or skip the track entirely.
Fatigue is a negative reaction that tells you your ears need a rest. A balanced mix with properly controlled presence should never cause fatigue at normal listening levels.
A harsh mix is usually the result of a few different factors with negative influence on the key presence frequencies.
It’s important to note that the human ear is especially sensitive to sound energy between 2 and 5 kHz.
This where the details of human speech are most clearly audible.
As a result of this sensitivity, it’s easy to overemphasize this area when mixing. If you add too much energy in the upper mids and highs, you run the risk of introducing harshness.
That said, a harsh mix is usually caused by one or more of the following factors:
Most intermediate producers don’t have the option to work in perfectly treated acoustic spaces.
Acoustic treatment is the practice of changing the sonic characteristics of a space to work better for music production.
Small, untreated rooms generally result in sharp acoustic reflections from hard surfaces.
These blend with the direct sound when you record and influence the response of your speakers when you mix.
The combination of direct sound and reflections creates resonant peaks and valleys due to cancellation.
If the room’s response gives you the impression of reduced highs and mids, you’ll naturally compensate by emphasizing presence.
The best audio engineers know how to capture sound on the way in so that it works in the mix.
Unfortunately, getting it right at the source is easier said than done.
Poorly recorded sounds may require lots of corrective EQ to fit with the rest of the mix.
Aggressive boosting or high-pass filtering can have negative effects on the sound and lead to add unnatural emphasis in the upper mids.
While subtle tape saturation can work wonders in a mix, it's easy to end up with too much of a good thing.
One of the principal effects of saturation is to add harmonics in the upper midrange.
While a bit of harmonic enhancement is often needed, too much can add extra energy where the sound is already harsh.
A great mix has a balanced spread of frequency energy from the sub-bass to the ultra-highs.
If your mix is already too boomy, the masking effect from additional low end may cause you to boost upper mids.
If you can’t make your sounds feel present without excessive boosting, consider clearing out lows elsewhere to make room.
With the causes out of the way, here are four techniques to help you fix a harsh mix:
The single most effective way to deal with harshness is to avoid it at the source.
Take extra care when capturing any sound with intense upper midrange.
I’m talking about staples like cymbals, distorted guitars and breathy vocalists.
If something sounds harsh during tracking, chances are it will be even more distracting after you add compression and EQ in the mix.
If possible, choose a different mic or reposition the one you have to avoid harsh sound.
A basic fact of mixing is that not every track can occupy the same space.
There are only so many instruments that can have emphasis in the upper mids before harshness sets in.
If you have a general idea of what should go where before you start, you’ll avoid the temptation to emphasize presence on every track.
One approach is to start from the bottom and try to give each element its appropriate role in the frequency balance.
If you cut lows and reduce upper mids where they’re not needed, you’ll end up with much more space for what’s left over.
Even if you do your best to reduce harshness, you still may be stuck with some problematic material.
Luckily, there are plugins that can come to the rescue when all else fails.
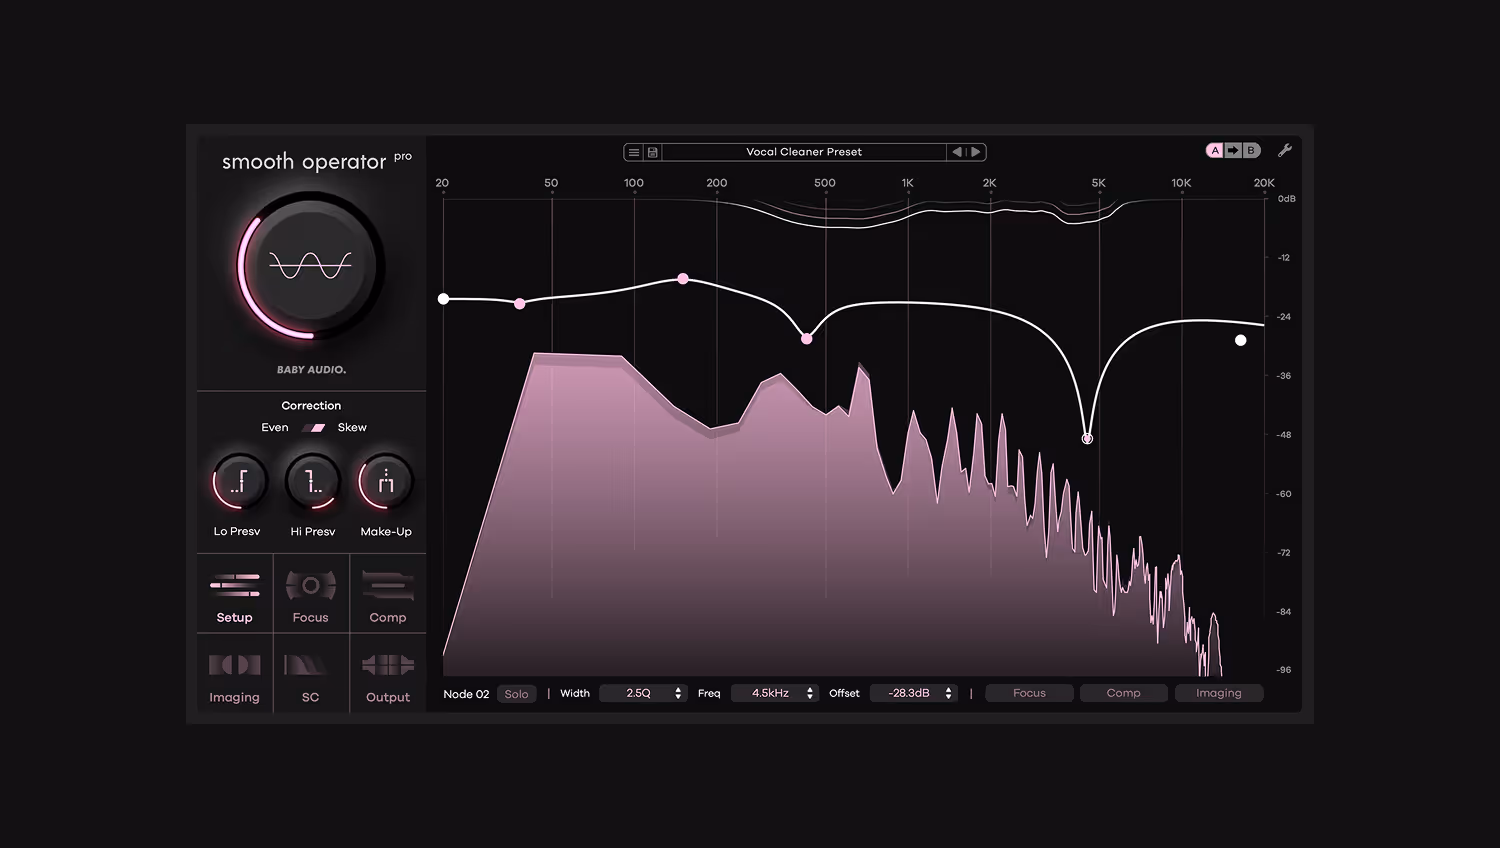
Smooth Operator Pro is a dynamic resonance suppression tool that works in the spectral domain.
Its algorithm lets you find problem frequency areas and address them with a transparent approach and precise control.
By adjusting the peak nodes tailoring the response, you can optimize the signal to decrease harshness and eliminate odd spikes and resonances.
Getting a smooth sound in your mix can be incredibly satisfying if you’ve struggled with harshness in the past.
Even though it may seem challenging, you can make a big impact if you understand the basics.
Now that you have an idea of the causes of harshness and their solutions, get back to your DAW and keep mixing.
Smooth Operator Pro is a powerful mixing tool for achieving cleaner mixes. It's advanced spectral dynamics processing easily elimintes mud and harsh resonances while leaving your sounds intact. With deep flexibility and state-of-the-art performance, Smooth Operator Pro is resonance suppression 2.0.


.avif)