No items in cart
Buy 2 Get 1 Free
Add 3 products to the cart and get the cheapest for free at checkout.
Add 3 products to the cart and get the cheapest for free at checkout.

.avif)
Grainferno is an advanced granular instrument built around a new way of synthesizing sound from existing audio. Its next-gen grain engine breaks your samples into microscopic fragments and rebuilds them into entirely new textures.
From pristine tonal clouds to volatile digital noise, Grainferno turns your sample library into an endless source of playable inspiration. Go from synth-like instruments to evolving atmospheres and experimental noise in a single plugin—all powered by your own sounds.
To get started, load a sample into Grainferno’s primary slot or select one from the factory library. Drag and drop a file from your DAW or your computer to add it to Grainferno.
If you drag in a sample from outside of the plugin, you can then use the sample arrows to scroll through the folder the loaded sample came from. If the loaded sample is a factory sample, the arrows will scroll through the factory library.
Grainferno can load two samples simultaneously to generate grains from contrasting sources, but only one is required for normal functionality.
Use the Normalize function in the upper right corner of the waveform display to scale the audio level if the source file level is too low. You can also adjust its root pitch in semitones if required. Grainferno’s pre-processing functions also include an auto-pitch tool for mapping the loaded sample to the closest C pitch. Auto-pitch works best for monophonic one-shots, but may be helpful for other types of sound.
ENV1 is the main volume envelope for Grainferno’s synthesis engine. To explore Grainferno’s basic sound, set ENV1 for a fast attack and medium release while experimenting with its other controls.
In the Grains panel, Rate controls the speed at which new grains are generated and Size controls their distance apart from one another. These are the basic parameters for the grain generation engine, and they interact with one another to produce varying results based on the source sample.
In the Movement panel, Scan moves the grain generation point forward or backwards through the sample and Scatter adds randomness to the position value.
The grain effects panel contains three essential functions, G-Filter, G-Comp and G-Blur. These effects are applied to each grain at the moment of generation and are key to creating novel sounds with Grainferno.
Next, use the Modulation panel to set Grainferno into motion. Click and drag any of the modulation sources to assign them to a parameter. Nearly all of Grainferno’s parameters are available for modulation, including cross-modulation between sources.
Finally, Grainferno comes with a suite of onboard effects built to enhance the output of its granular engine. Open the FX panel to engage the effects and edit their parameters. Drag and drop to change the order of effects in the signal chain.
Grainferno is perfect for generating active and evolving soundscapes from any input material.
With grains of any size generated from wide-ranging positions within the audio file, any sound can take on the glitchy, digital character of a microsampled swarm.
When creating character sounds and ‘ear candy,’ Grainferno’s ability to texturalize any audio file can quickly create granular variations on sounds already present in your session.
Grainferno can produce playable tonal sounds that function like the oscillator of a traditional synth.
The grain engine’s Rate control allows the generation of grains at audio frequencies, meaning that your samples become the basis for an entirely new tone generated by the granular engine.
This oscillator-like tone can be further shaped by Grainferno’s modulation section to create unique tonal synth sounds not possible with other granular instruments.
Grainferno’s Rate and Scan controls can be set as divisions of the host tempo in BPM sync mode.
With Rate set to match the note values present in rhythmic source material, Grainferno can generate grains progressively through the sample as if playing it back in real time.
This allows you to resynthesize drum loops and other rhythmic material while maintaining the original tempo if required.
Grainferno offers the ability to generate grains from two different samples within the same patch. By blending between the two sources with the seven unique Morph modes you can mix and match your samples into unique granular permutations.
Adding motion to the Morph control with any of Grainferno’s modulation sources unlocks evolving combinations that blend the characteristics of each source sample.
Grainferno requires at least one sample to generate its sound. The sample you choose makes a big impact on the sonic results Grainferno delivers. Experimenting with sample choice can be just as powerful as editing Grainferno’s granular parameters.
Try using different types of input audio and listening for the results with the same preset. If you’re not sure which samples to try, Grainferno’s factory sample library contains hand-picked material to help you get started.
Note: Grainferno accepts samples in WAV, AIFF, MP3, FLAC and Ogg Vorbis formats. The maximum permitted length is 10 minutes.
Grainferno’s top menu panel offers two view modes for interacting with the plugin.
Play mode gives you a simplified control scheme focused on the selected sample and its four Macro controls.
Macros are dynamic mappings of multiple parameters that give you instant access to the most impactful controls in any preset.
If you’re not ready to dive into Grainferno’s deep editing parameters, Play mode lets you focus on choosing a sample, selecting its starting position and interacting with the preset’s macro controls.
Design mode exposes all Grainferno’s parameters and lets you go hands-on with the grain generation engine.
Here you can manipulate all available controls, change their scaling options and route modulation sources to destinations. Inside Design mode you can also assign your own Macro controls.
To assign a Macro, hover over its number until you see the four-way arrow (move) icon and drag and drop it to the parameter to connect. A macro control may be connected to any number of parameters within Grainferno.
Grainferno comes with six control templates for quickly configuring its parameters for specific results.
Selecting a template does not change the behavior of the granular engine, it simply provides preset parameter settings as a starting point for sound design.
Templates can be found on the left side of Grainferno’s bottom panel:

Grainferno’s six factory templates are as follows:
Init preset: The rightmost icon following Grainferno’s six templates is an Init preset shortcut that allows you to quickly reset all Grainferno’s parameters to their default setting.

From left to right, the top menu gives you the following options:
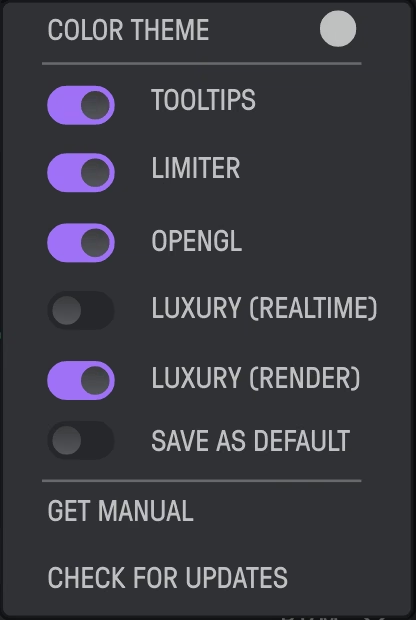
Toggle between Grainferno’s light and dark UI themes.
Display a tooltip for the parameter in focus in the center of Grainferno’s bottom panel.
Engage a global limiter on Grainferno’s output to avoid excessive levels.
Enable or disable graphics handling via OpenGL. Disabling OpenGL may increase compatibility with some setups.
Enable higher processing resolution for the grain generation engine at the expense of some additional CPU usage.
Use the maximum available processing resolution when rendering Grainferno’s output during audio export, bounce or other offline operations.
Save the selected settings (UI theme, window size, limiter, OpenGL, tooltips) as Grainferno’s default configuration when loading a new instance. Click on the toggle once to save your current settings.
When using the standalone application, Grainferno offers the following additional settings:
Download Grainferno’s full user manual.
Get the latest version of Grainferno.
To open Grainferno’s activation preferences, click the plugin title logo in the top left corner.
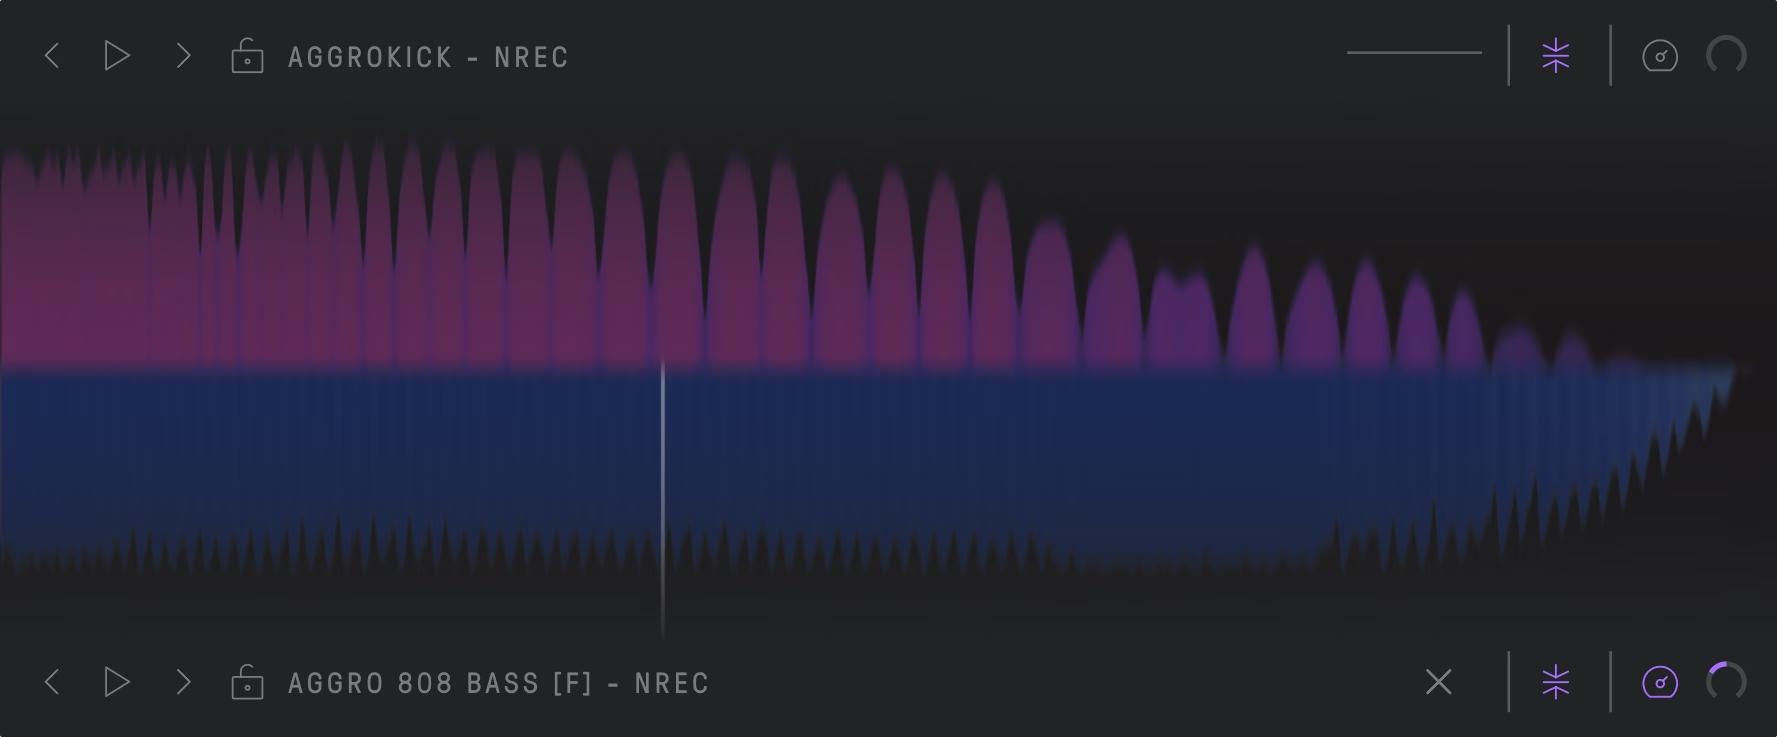
In both Design view and Play view, Grainferno’s main display shows the waveform of the selected audio file.
The grain generation point is shown with a playhead marker in the set position. Click anywhere in the sample to change the position of the playhead.
When two audio files are loaded, the second sample is shown on the bottom portion of the waveform display in a contrasting color.
Samples 1 and 2 may have different grain generation positions.
Select a sample by dragging and dropping a file from your DAW or a folder on your computer.
You can also select a sample using your system file browser by clicking the folder icon at the top left of the sample browser window.
Use the lock icon to keep one or both samples in place while scrolling through presets.
By default, Grainferno normalizes the selected sample’s level for the best results from its granular engine. To disable normalization or turn it back on, click the Normalize icon.
For one-shot samples, Grainferno offers automatic tuning to the nearest C for quick tonal results.
Click the auto-tune icon to enable automatic tuning. Manual tuning for longer samples can be applied in semitones using the variable tuning control to its right, with a range of +/- 12 semitones.
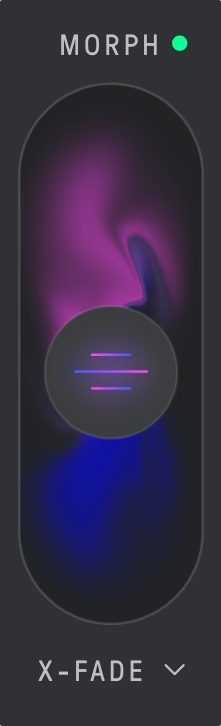
When two samples are loaded, Grainferno can generate grains from a blend of both as determined by the Morph slider.
The Morph slider may be set to a static value or modulated with any of Grainferno’s modulation sources.
The Morph slider offers the following blend modes:
The Grains menu parameters define how the granular engine generates new grains from the loaded sample.
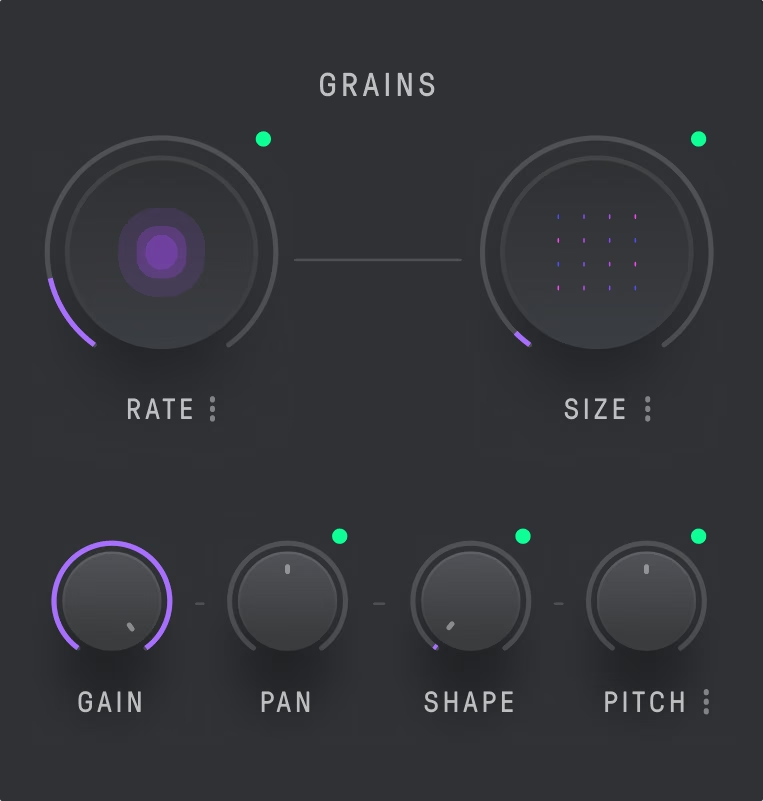
Rate controls how fast new grains are generated. Grainferno can generate grains at rates that extend into the audio range, allowing any sample to be used like a traditional synth oscillator.
Or, new grains can occur at rates slower than the total length of the original sample.
The Rate control has several scaling options for precise control of the grain generation frequency for different results:
Key-mapped modes: Modes in the key-mapped submenu sync the grain generation rate to the frequency of the incoming MIDI note, with an offset determined by the Rate knob value.
Milliseconds: Set the grain generation rate in ms.
BPM: Set the grain generation rate in divisions of the host tempo.
Size controls the duration of the microsampled grains as a multiple of their distance apart from one another. Grain size can vary from microscopic to up to 36x spacing.
The grain Size menu has two scaling options in its submenu:
Set the level of the generated grains.
Set the stereo position of the generated grains.
Define the shape of the window used for microsampling individual grains.
Set the pitch of the generated grains according to the following scaling options:
Key-mapped: Modes in the key-mapped submenu set the pitch of the generated grains to the incoming note value with an offset according to the following options:
Fixed: Modes in the fixed submenu map the pitch to a static value determined by the setting and scaling mode.
Scale: Modes in the scale menu constrain the available pitch increments to the notes of a musical scale in semitones starting from the generated pitch.
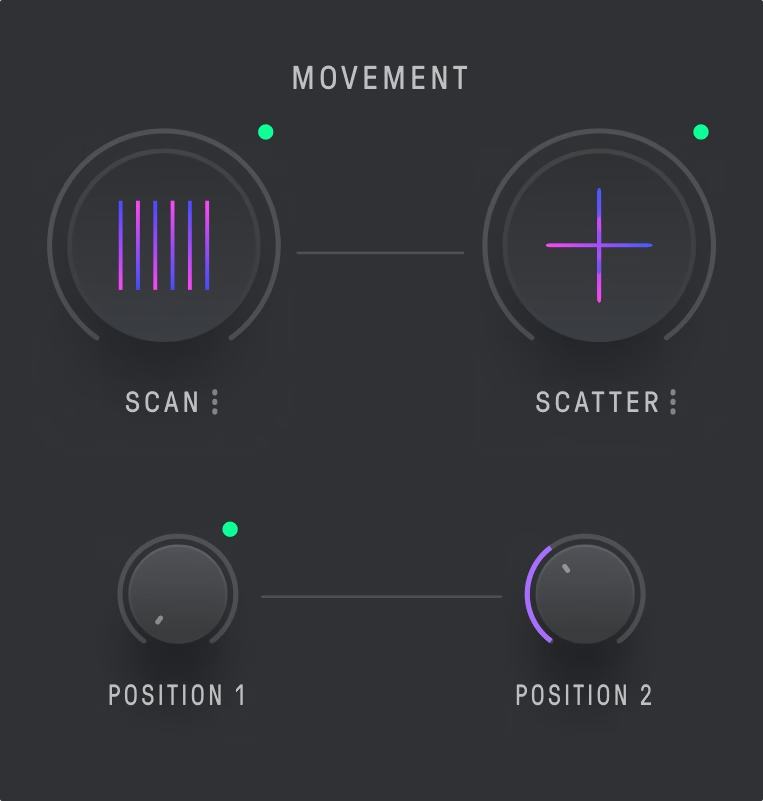
The controls in the Movement menu shift the starting position of the grain generation engine throughout the sample.
Scan advances the grain generation point through the sample according to the set direction and rate. At 12 o’clock on the dial, there is no scan movement in either direction. As you move the dial clockwise, scan movement will progress from left to right according to the set rate. For values on the left side of the dial (counterclockwise from 12 o’clock) scan movement will occur in reverse, playing backward through the sample.
The Scan rate can be set in multiples of the grain generation rate, or as a division of the host tempo in BPM mode.
BPM mode is useful for preserving rhythmic coherence when using percussive source material such as beats and drum loops.
Scatter introduces randomness to the grain generation position within the samples.
At low values, the playhead position will randomize in the vicinity of the set position. When set to 100% the playhead position will be set randomly from any position throughout the sample’s entire duration.
In addition to clicking inside the sample visualizer, the grain generation position for sample 1 and 2 can be set as a percentage of the sample’s total duration using the position dials.
Position 1 and 2 may also be modulated for interesting sonic results.
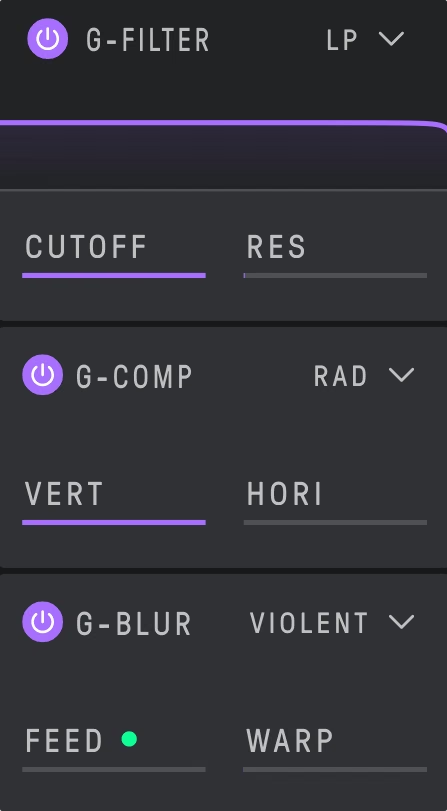
Grainferno’s core toneshaping processors act on each grain at the moment of generation.
This allows traditional effects like filter, compression and feedback to be applied per-grain, drastically altering the characteristics of the individual grains.
G-Filter offers a multimode filter applied per-grain with adjustable cutoff and resonance controls.
Choose from low-pass, high-pass, band-pass and band-reject filter behavior.
Scale the level of individual grains upwards with the Vert control and set the intensity of compression across the duration of each grain with the Horiz control to emphasize different tonal qualities.
G-Comp’s Radical mode compresses grains upwards based on radical functions, and the Threshold mode works like a traditional downwards compressor.
The Inverse mode reverses the compression behavior, making louder grains quieter, and quieter grains louder.
G-Blur adds feedback to the grain generation engine for a smearing effect that blurs the grain onset at the point of generation.
Increase the feedback with the Feed control and add descending pitch modulation with the Warp control.
G-Blur has a Normal mode as well as a Violent setting that adds ring modulation to the feedback patch for additional intensity.
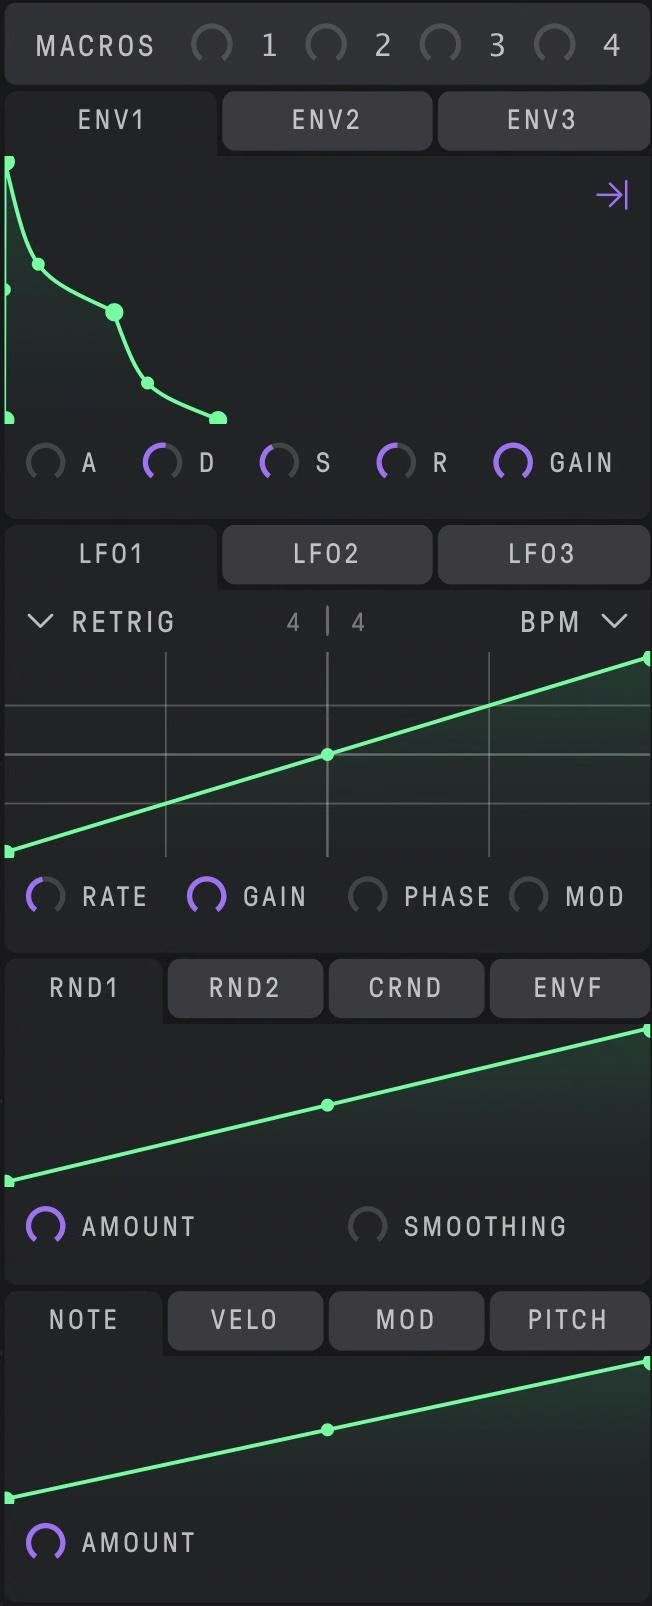
Assign Grainferno’s four macro controls using the four-way arrow (move) icon that appears when hovering over the macro number at the top of the modulation menu.
Macros can be linked to any number of parameters within Grainferno. Once linked, Macros can be manipulated from the Play view and given custom labels per preset. Click the macro label text from within the Play view to enter custom label text.
Grainferno offers extensive modulation capabilities with three envelopes, three LFOs, three random value generators and an envelope follower.
You can also use the incoming note value, velocity, controller mod wheel or controller pitch wheel position as modulation sources.
Connect modulation assignments by dragging and dropping a modulation source onto any of the available destination parameters.
When hovering over a modulation tab, the four-way arrow (move) icon will appear, indicating that drag and drop is available. A green circle will appear over parameters that are available for modulation.
Almost all of Grainferno’s parameters can be modulated, including effects parameters and the settings of other sources within the modulation menu.
Once a modulation connection has been made, hovering over the destination parameter will reveal its modulation assignment pane:
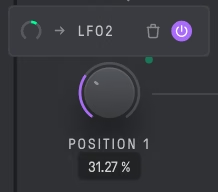
Here you can view the parameter’s connected modulation sources, configure their behavior, delete them or bypass them temporarily.
From left to right, the modulation assignment pane options are as follows:
Grainferno’s three envelope generators feature traditional ADSR controls with editable slopes within the breakpoint display window. You can double click a tension point to reset it.
You can also adjust attack, decay, sustain, release, and gain with the rotary dials along the bottom row of the envelope panel.
ENV1 is the default volume envelope for Grainferno’s granular engine. ENV2 and ENV3 may be freely assigned.
Note: ENV1 has two modes for its default assignment: VOICE and GRAIN. Click the arrow icon to toggle between them.
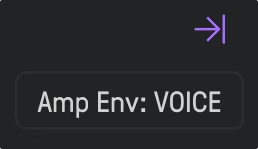
VOICE mode is selected by default. In VOICE mode, Grainferno’s main ADSR envelope acts on each note played according to the keypress behavior, as in a traditional polyphonic synth. In GRAIN mode the ADSR envelope is applied to the generated grains, allowing for unique sound design possibilities at slower rate settings.
Each of Grainferno’s three LFOs can be set freely in Hz, or to divisions of the host tempo in BPM mode.
Grain Sync mode matches the LFO start point to the onset of the grain generation. Its rate can be set from 2 to 64 grains.
Retrig mode begins the LFO cycle from the beginning on each key press. Free mode lets the LFO run continuously at the selected frequency. Env mode cycles through the LFO once for envelope-style behavior.
All three LFOs have the option to set global Gain and Phase, determining their wave amplitude and starting position, respectively.
The Modulo parameter (labelled ‘MOD’ in the bottom row of the LFO panel) performs a unique scaling operation on the LFO waveshape that multiplies it up and wraps its values back into range.
Experiment with different Modulo values to create unique modulation patterns.
Snap LFO breakpoints to configurable divisions along both the X and Y axes. In BPM mode, the X-axis grid becomes tempo divisions of the total duration of the LFO cycle set by the rate control. The Y-axis grid offers equal divisions of the LFO amplitude value for easier entry of common values.
Grainferno offers three random modulation sources as well as an envelope follower source that tracks the amplitude of sample 1.
Rand 1 and Rand 2 output distinct random values for each of their assignments, giving you true random results for all linked parameters.
CRAND outputs the same randomly generated value to all assigned destinations allowing you to link behavior between destinations.
ENVF is an envelope follower linked to the amplitude of Sample 1.
All random value generators and the envelope follower offer global Amount control as well as a variable Smoothing function to soften the transition between values.
Grainferno’s final modulation section allows you to use incoming input to the plugin as a modulation source.
Use the incoming MIDI note, velocity, mod or pitchwheel position for additional modulation linked to your controller or MIDI clip.
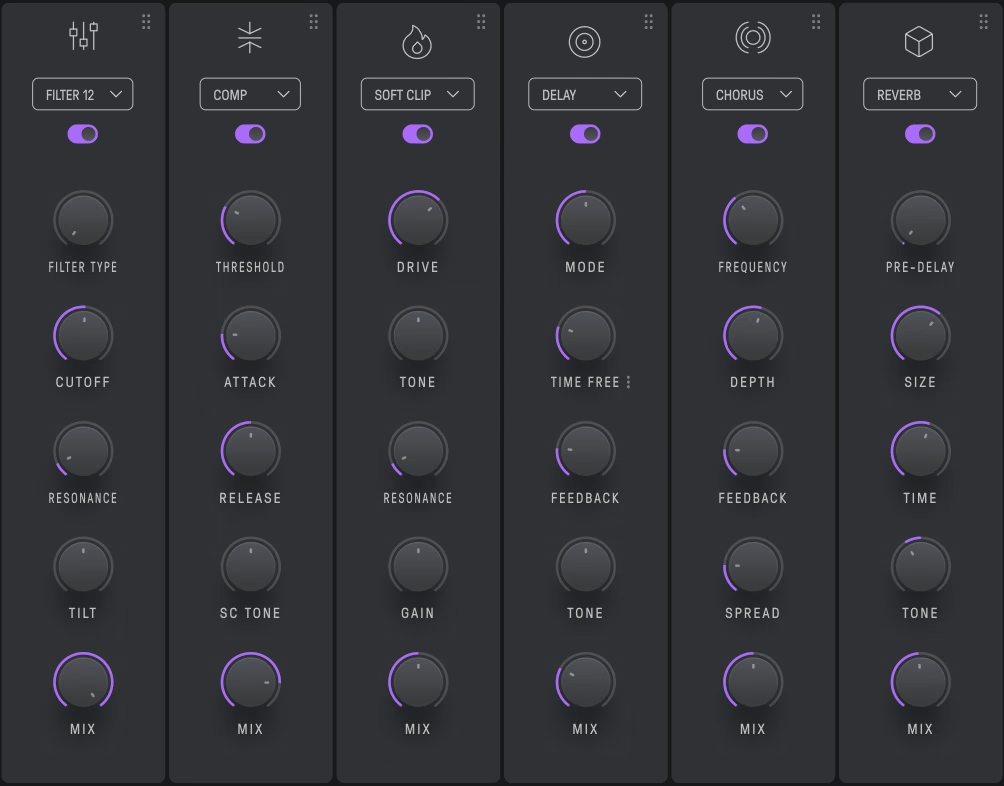
Grainferno’s onboard effects were built specifically for enhancing the wide variety of sonic possibilities available with its granular engine.
Click the FX tab in the plugin’s top menu bar to show the Effects view. You can quickly toggle all effects on or off from the Play or Design view by clicking the power icon within the FX tab.
Inside the Effects view, engage or bypass individual effects using the slide toggle at the top of each module.
You can reorder the signal flow by dragging and dropping modules from left to right. To reorder modules, click and drag the six-dot position handle at the top right of the module. Almost all effects parameters are available as modulation destinations.
Grainferno includes the following effects modules:
The EQ effect module offers three selectable modes: a simple three band EQ, a 12 dB/octave multimode filter and a 24 dB/octave multimode filter.
The EQ mode offers fixed high, low and mid bands as well as a dual high-pass/low-pass filter control via the tone cut control. Negative values (counterclockwise on the dial) lower the cutoff frequency of a low-pass filter, while positive values (clockwise on the dial) raise the cutoff frequency of a high-pass filter.
Filter 12 and Filter 24 are resonant multimode filters with low-pass, high-pass, bandpass, and notch modes.
In addition to cutoff, resonance and mix controls, both Filter modes include a tilt-shift EQ at the selected slope.
The Comp module includes two modes for dynamic range compression.
Comp is a standard downwards compressor with threshold, attack/release and mix controls. SC Tone is a tilt-shift EQ on the detector signal for tailoring the compressor’s response when excessive lows or highs are present.
OTT is the popular upwards/downwards multiband compressor effect that results in an extremely aggressive in-your-face compression with controllable low, mid and high frequencies.
The Time knob in OTT mode controls attack and release time simultaneously with values displayed in the dialog below the knob.
The Clipping module contains six different clipping styles with varying characteristics.
Each clipping style includes drive, tone, resonance, gain and mix controls:
The modulation module offers Chorus, Phaser and Flanger.
Each effect has controls for Frequency, Depth, Feedback, Spread and Mix.
Grainferno’s delay module comes with standard and reverse delays. Both offer three modes: Normal, Ping-Pong and Glitched.
Ping-Pong bounces the repeats back and forth across the left and right channels, while Glitched offers a unique rhythmic feedback pattern.
Delay time may be set freely in ms or in divisions of the host tempo for rhythmic delay effects.
The delay module also includes variable feedback, tone and mix controls.
Grainferno’s onboard reverb effect has two modes: Reverb and Shimmer.
Reverb is a traditional hall-style reverb with controls for Pre-Delay, Size, Time, Tone and Mix.
The Shimmer mode enhances the decay of upper frequencies in the reverb tail, resulting in a ghostly halo effect that hovers above the sound.
Note that Pre-Delay and Size for both reverb modes are not available as modulation destinations.
Grainferno comes equipped with several shortcuts to speed up your workflow.
Grainferno comes loaded with over 300 presets created by leading producers, artists and sound designers.
Preset credits (and special thanks to):
If you drag in a sample from outside of the plugin, you can then use the sample arrows to scroll through the folder the loaded sample came from. If the loaded sample is a factory sample, the arrows will scroll through the factory library.
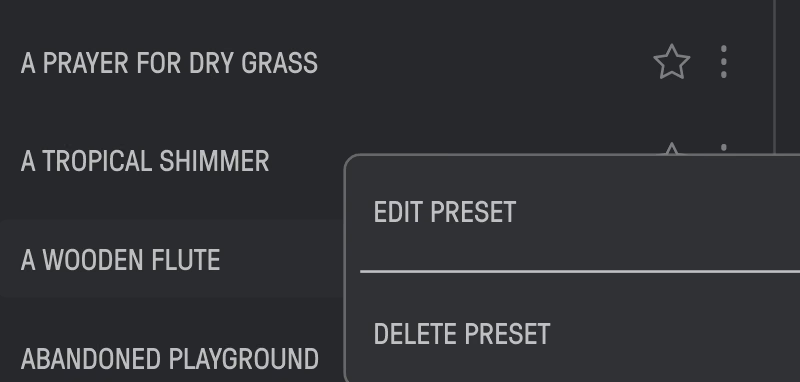
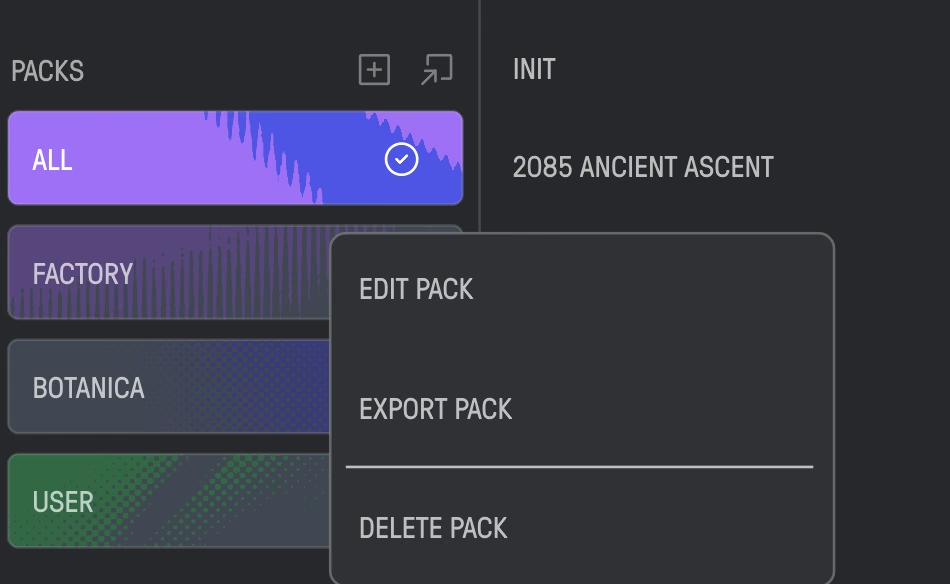
Our recommendation is to make all edits to preset packs and individual presets from within the plugin itself. You can right click a pack/preset for more options or use the 3 dot menu to either edit/delete a preset or edit/delete/export a pack. You can’t edit the Factory pack.
It’s best if you drag in samples that are already named to your liking if you want them to appear a certain way in the plugin window when you load/export.
If you find your presets are not loading with the intended sample, this likely means the name of all or some of the sample, sample folder, preset, or preset pack was changed outside of the plugin. You can check on and manually edit the metadata text of an individual preset (.baby) to the correct pathing as necessary, but please be careful making any changes here. Relevant pathing to individual presets is as follows:
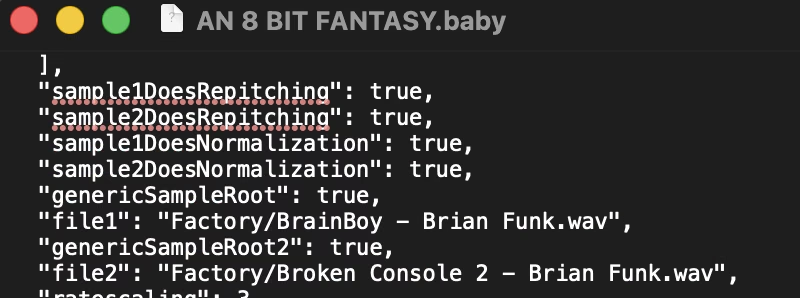


Pathing Mac
/Library/Application Support/BABY Audio/presets
/Library/Application Support/BABY Audio/settings
Write us at support@babyaud.io if you need more help.
Installation instructions are emailed to you right after your purchase, however you can always go to www.babyaud.io/account to view or license keys and download your software. After downloading, unzip the file and select either Mac or PC depending on your system.
If you have an active subscription to the Plugin Collection Plan, Grainferno will appear in your Baby Audio Manager app for download.
Make sure your machine is registered, get the software by clicking ‘Download’ and follow the instructions to install.
Activate your software by entering the license key that was emailed to you when you bought Grainferno. Serial keys are entered in the ‘trial mode’ open screen. If you have any problems activating, please email support@babyaud.io.
If you’re running Grainferno in trial mode, please note that the trial will output 5 seconds of silence every 60 seconds. To buy the full version, go to: https://babyaud.io/grainferno
Please read our End User License Agreement here: www.babyaud.io/eula
We hope you’ll enjoy Grainferno! If you run into any issues or have questions along the way, you can always contact us at support@babyaud.io.


.png)